

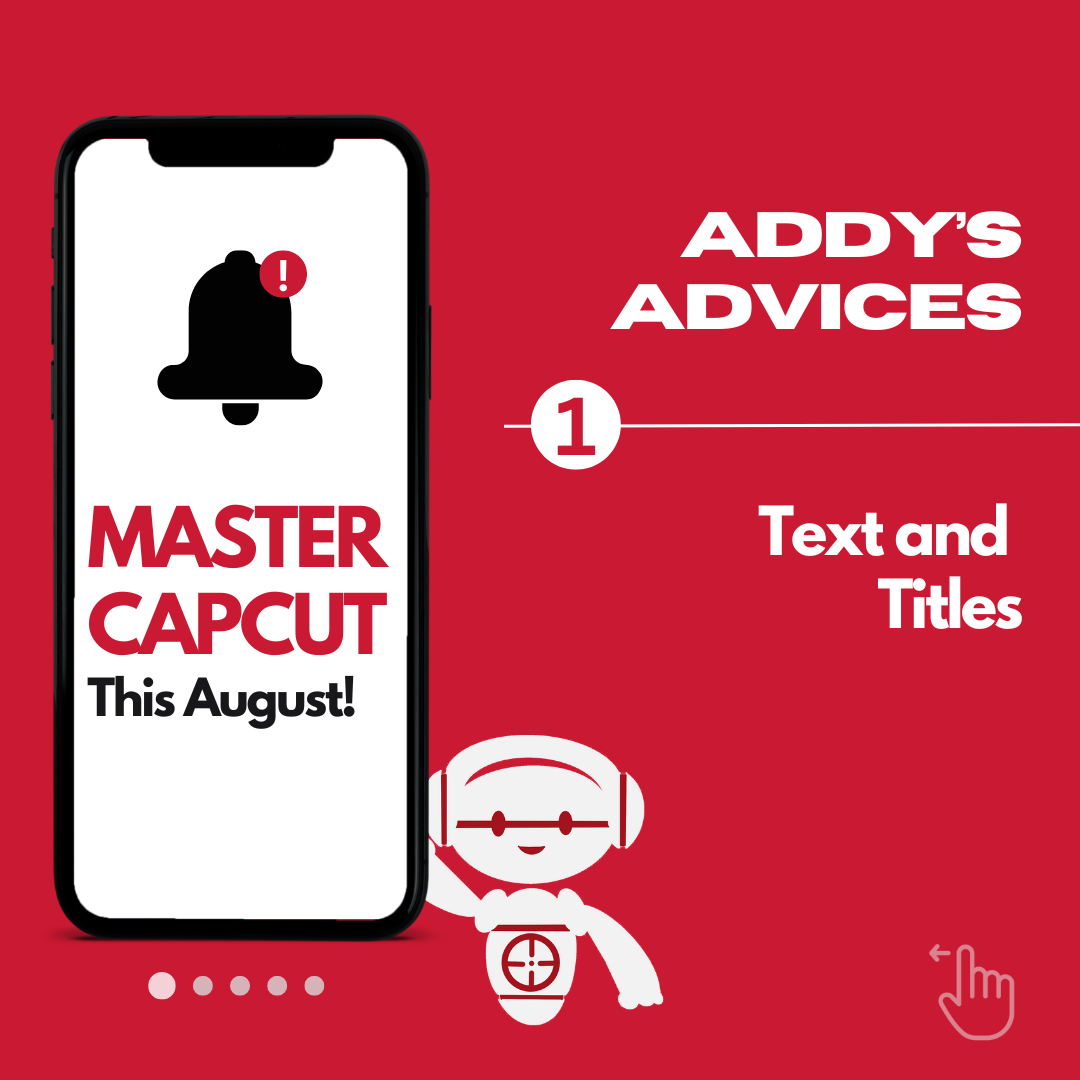
Get Started with CapCut, from Downloading the App to Publishing a Video
AUGUST, 2024
Welcome to the first issue of Addy’s Advice, a monthly series by us – adshot.io dedicated to helping you navigate the world of Influencer Marketing. Each month, we’ll bring you different tutorials to aid you on your journey. Today, we’re diving into CapCut, a powerful video editing app that’s a favorite among TikTok users.
Even if you’re not one of TikTok’s billion active users, you’ve probably seen CapCut’s logo on videos, enticing you to try out various templates. But what exactly is CapCut, and how do you use it?
In this guide, we’ll cover the basics of CapCut, from navigating the app to mastering essential editing techniques. Let’s get started!
1. What is CapCut?
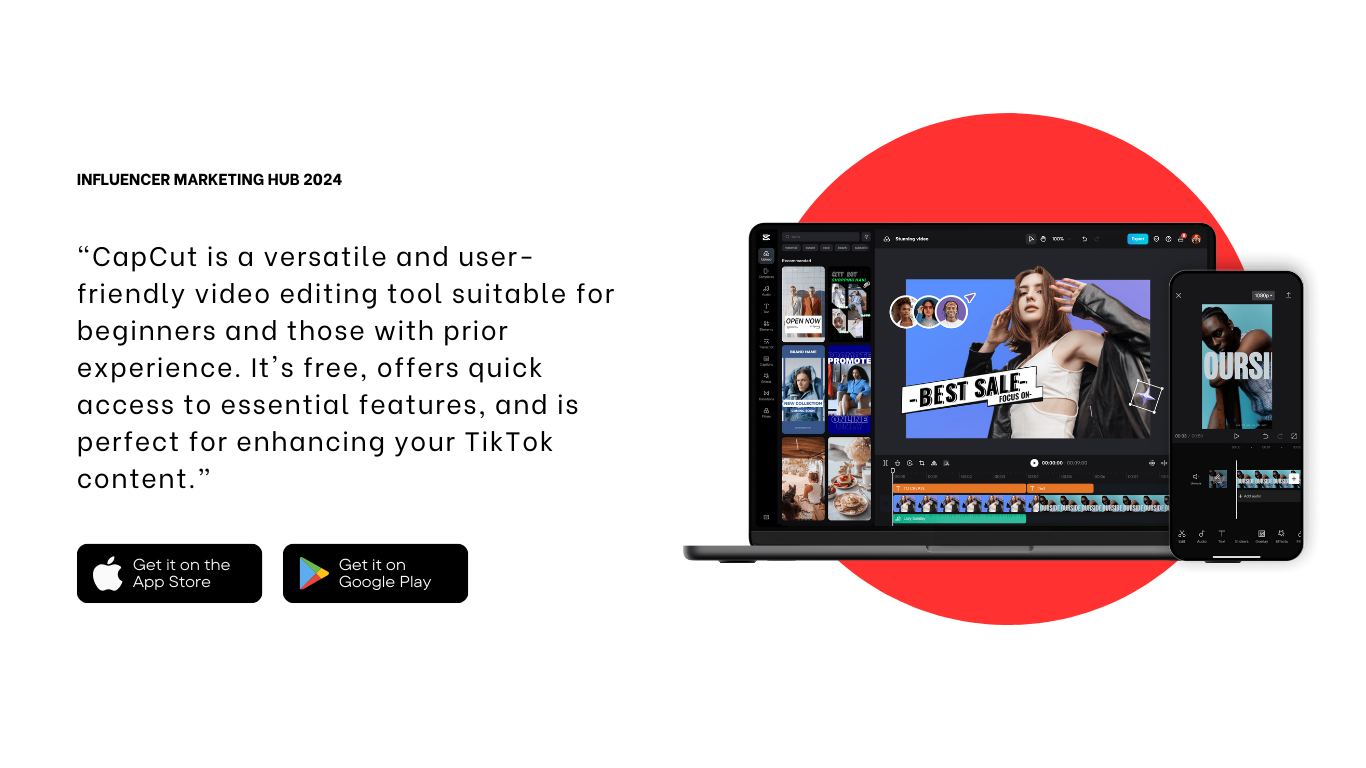
Meet CapCut, the ultimate creative powerhouse for video editing! This free, all-in-one tool from ByteDance (the geniuses behind TikTok) is most creators’ go-to choice. With its user-friendly interface and powerful features, CapCut lets anyone create amazing video ads and so much more.
By sharing the same developer with TikTok, you’ll be amazed at how similar and seamless the two apps are!
2. How to Use CapCut?
If you’re a TikTok content creator, you’ve probably used the app’s basic editing tools and templates. However, CapCut takes video editing to the next level with advanced features like one-click background removal, an extensive range of templates, and AI enhancements. This makes CapCut an excellent choice for anyone looking to elevate their video editing on a mobile device.
CapCut is free to download from all mobile app stores and is also available online and for Windows and Mac. In this guide, we’ll focus on the free mobile app version.
For users seeking more advanced capabilities, CapCut Pro is available. It offers additional features and extra storage for $13.99 per month or $129.99 per year, often with discounts. You can also purchase extra cloud storage to keep your projects safe.
3. Getting Started: Downloading, Importing, and AutoCut.
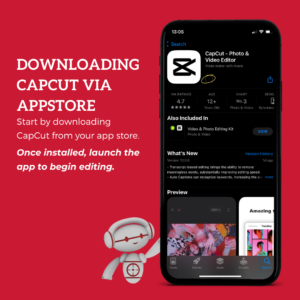
3.1. Download and Install CapCut
First, head over to the App Store (or Google Play Store) and download CapCut. Once installed, open the app to begin your editing journey.
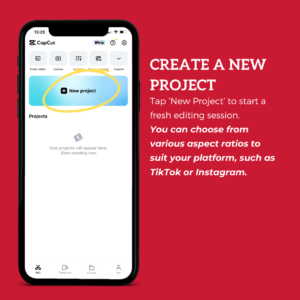
3.2. Create a New Project
After launching the app, tap ‘New Project’ to start a new editing session. This will open up a workspace where you can begin crafting your video.
CapCut allows you to select different aspect ratios to fit various platforms. Whether you’re creating content for TikTok, Instagram, or another platform, choose the aspect ratio that best suits your needs.
3.3. Import Your Media
Next, import the videos, images, and audio files you want to use in your project. Simply select your media from your device and add it to your project timeline.
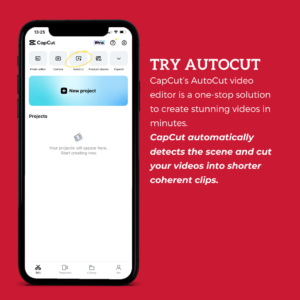
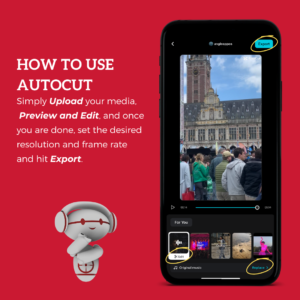
3.4. Try AutoCut
One of CapCut’s standout features is its AutoCut video editor, which simplifies the editing process. AutoCut automatically detects scenes and cuts your videos into shorter, coherent clips.
3.5. Using AutoCut
- Upload Your Media: Add your video clips to the AutoCut editor.
- Preview and Edit: Let AutoCut do its magic, then preview the automatically cut clips. Make any adjustments as needed.
- Export: Once you’re satisfied with your edits, set your desired resolution and frame rate, and hit Export to save your video.

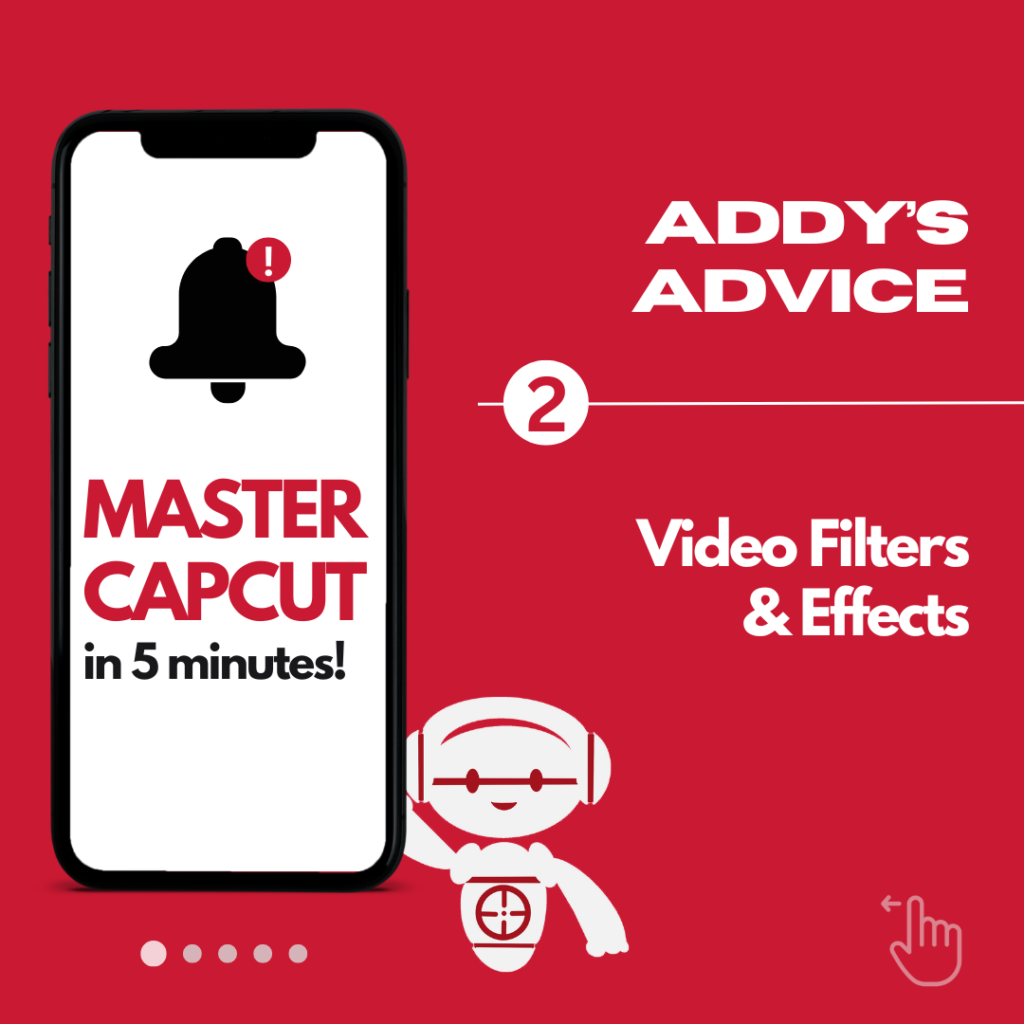
4. Video Filters and Effects
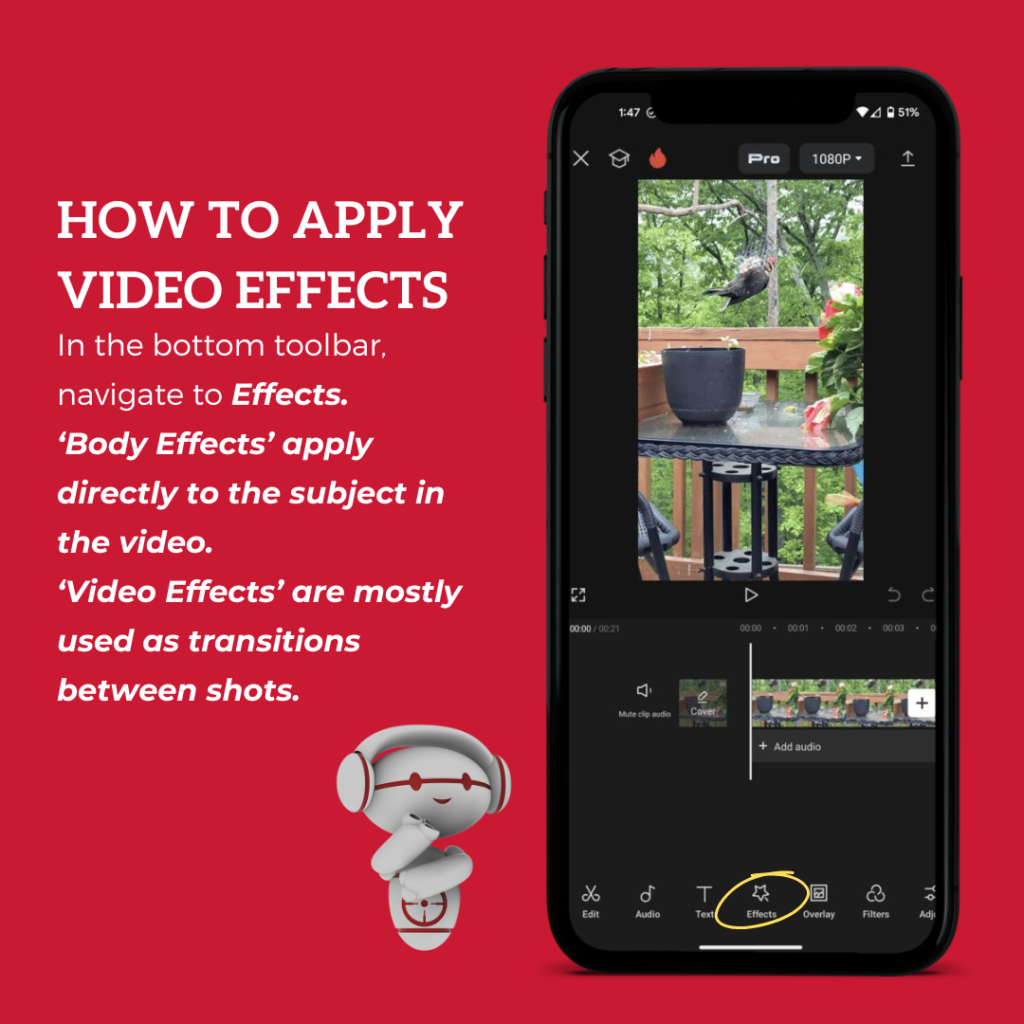
4.1. How to apply video effects
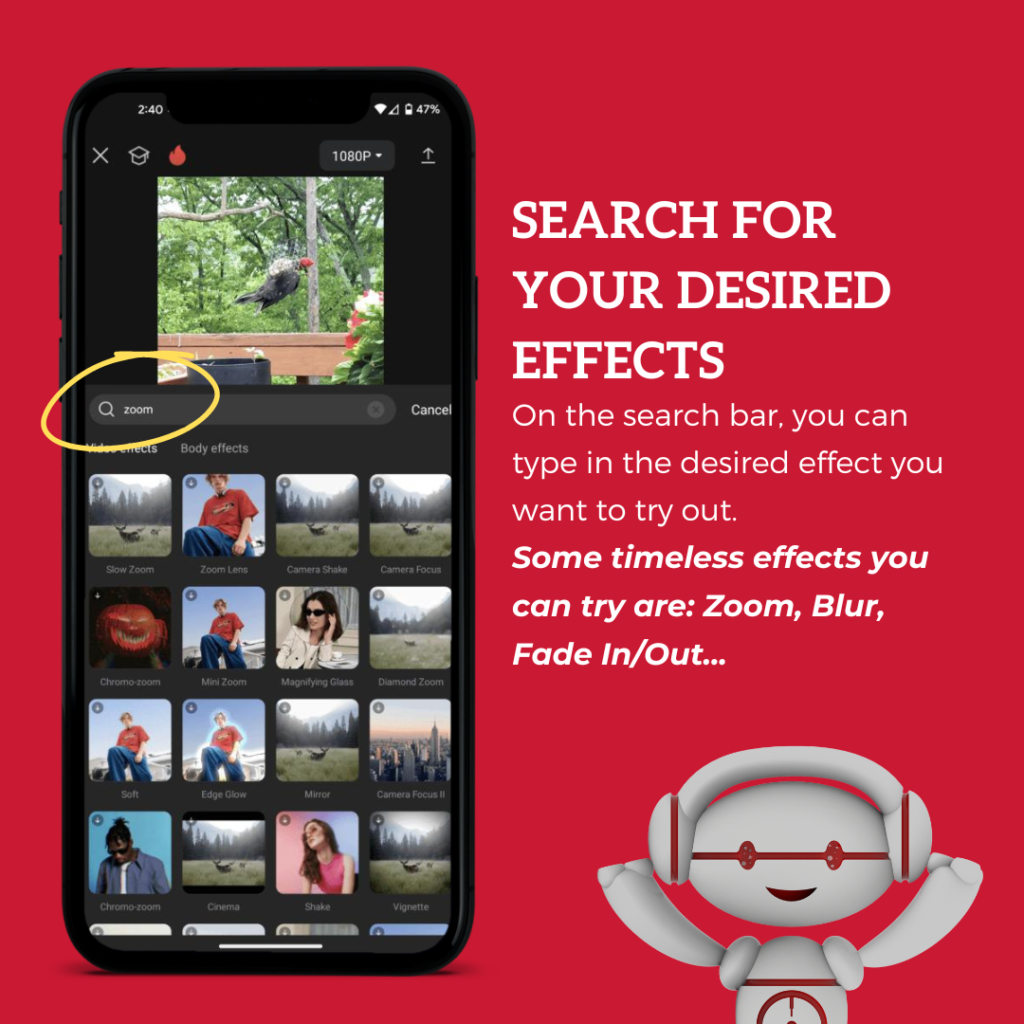
To begin, navigate to the ‘Effects’ option in the bottom toolbar of your workspace. Here, you have two primary types of effects to choose from. ‘Body Effects’ are designed to apply directly to the subject in your video, enhancing features like motion or appearance. On the other hand, ‘Video Effects’ are typically used as transitions between shots, adding a creative flair to your video sequences.
If you have a specific effect in mind, use the search bar to find it quickly. Some timeless effects worth trying include Zoom, Blur, and Fade In/Out.
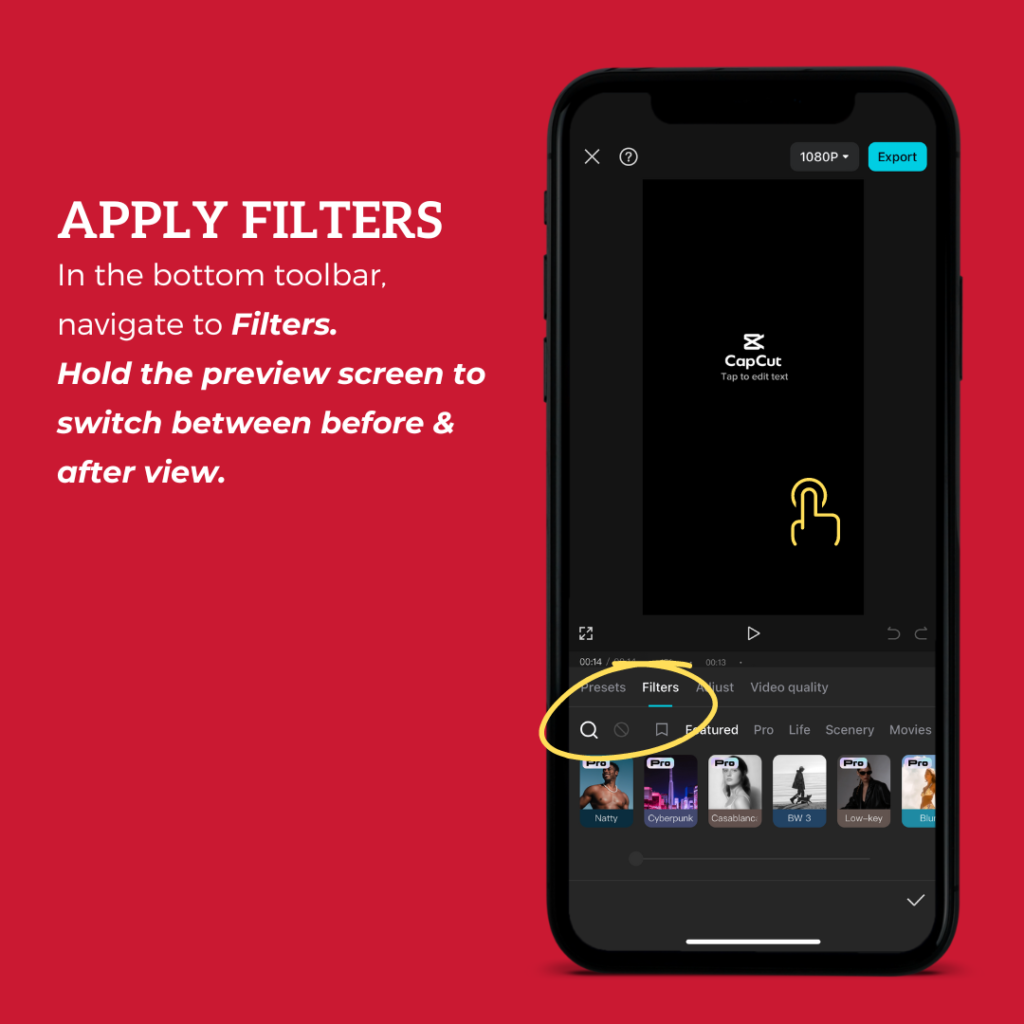
4.2. how to apply filters
For filters, start by selecting ‘Filters’ from the bottom toolbar. To see how a filter changes your video, hold the preview screen to switch between the before and after views. This allows you to compare the original video with the filtered version easily.
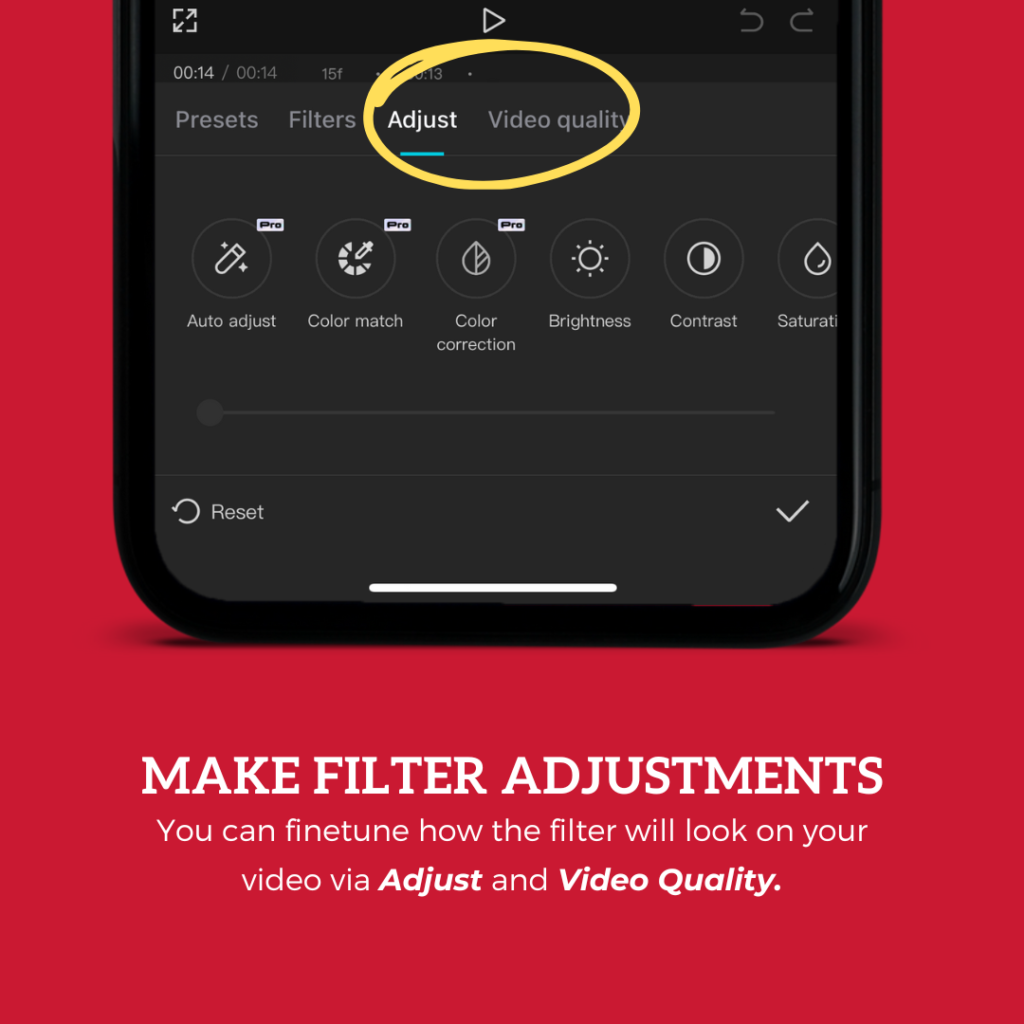
4.3. make adjustments
To perfect the look, you can fine-tune the filter using the ‘Adjust’ and ‘Video Quality’ settings. These options let you control how the filter affects your video, ensuring you achieve the desired aesthetic.
By following these steps, you can effortlessly apply and customize video filters and effects in CapCut, creating visually stunning content that stands out.
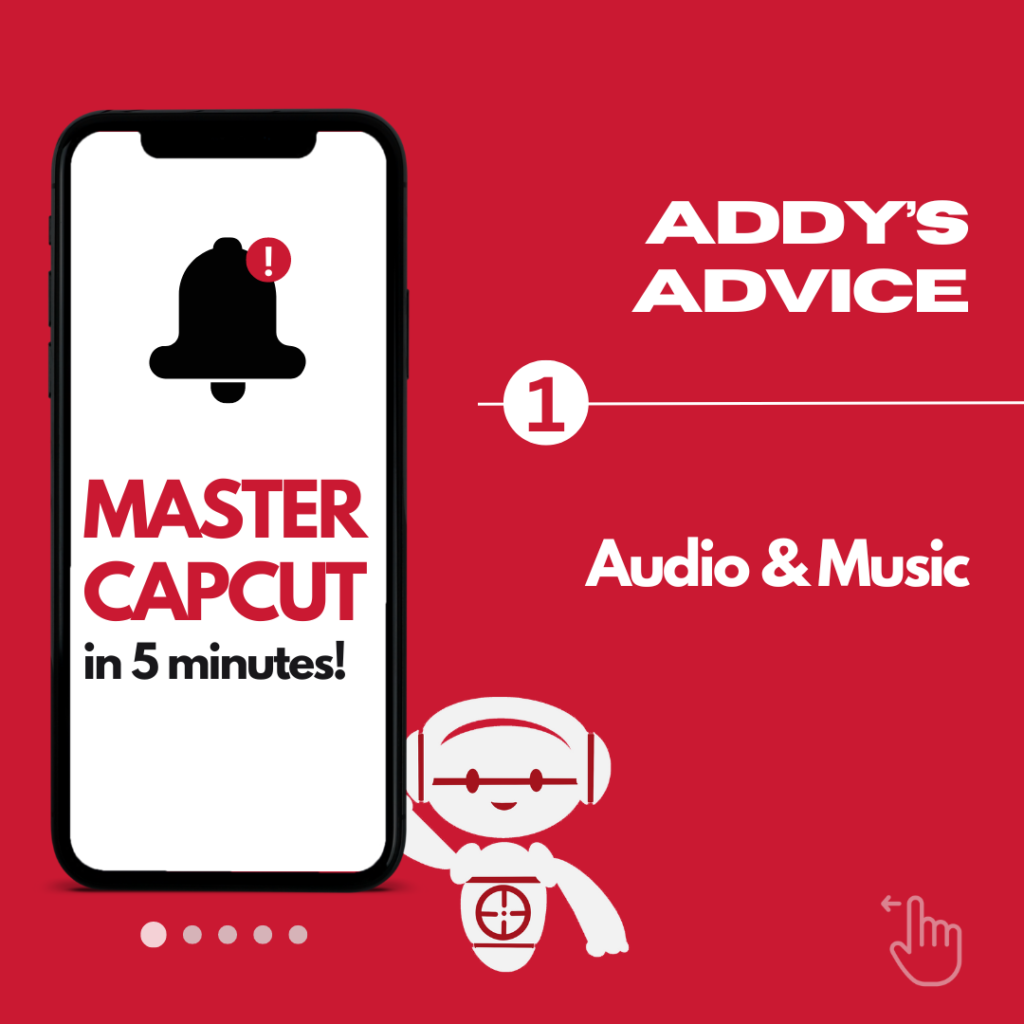
5. Audio and music
Adding music or audio to your video in CapCut is a straightforward process that can enhance your content significantly. Here’s how you can do it.
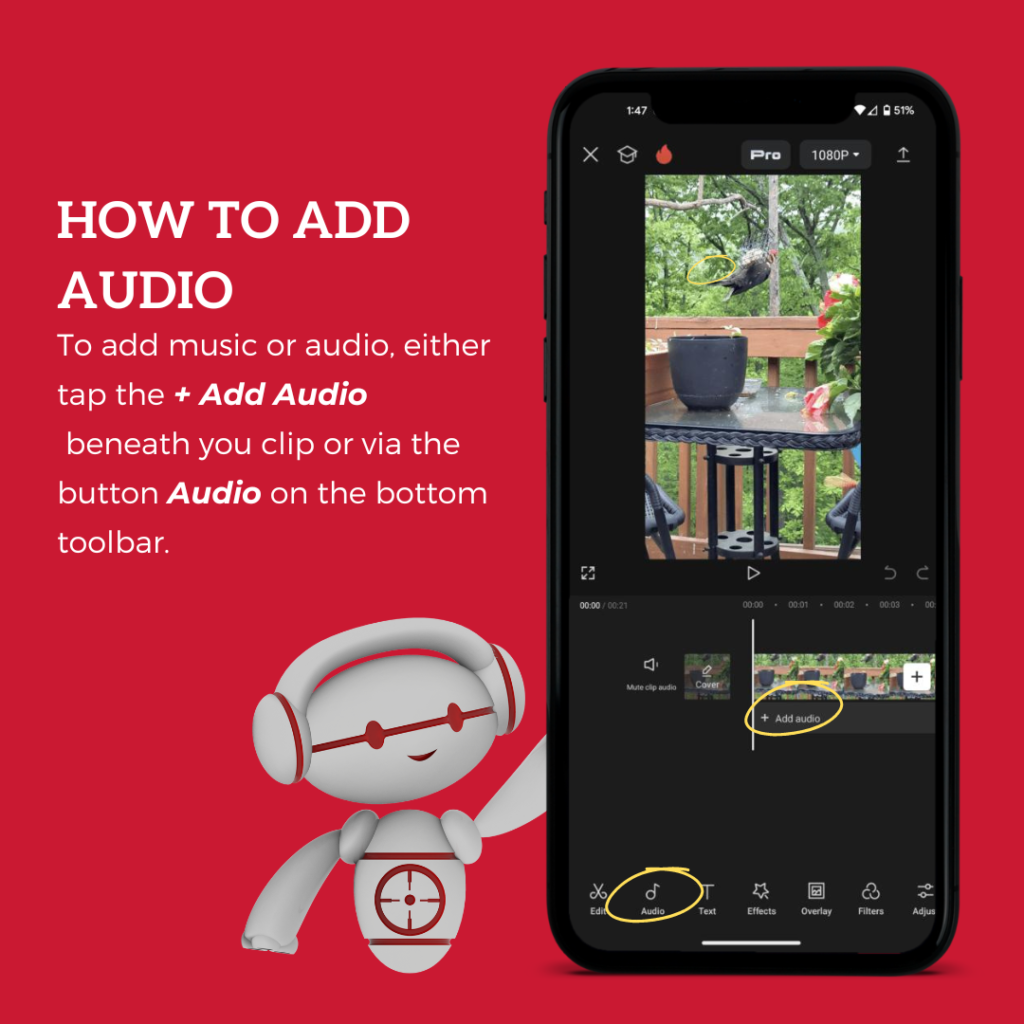
5.1. how to add audio
To begin, you can add music or audio by tapping the ‘+ Add Audio’ button beneath your clip or selecting the ‘Audio’ button on the bottom toolbar. This will open up a range of options for browsing sounds.
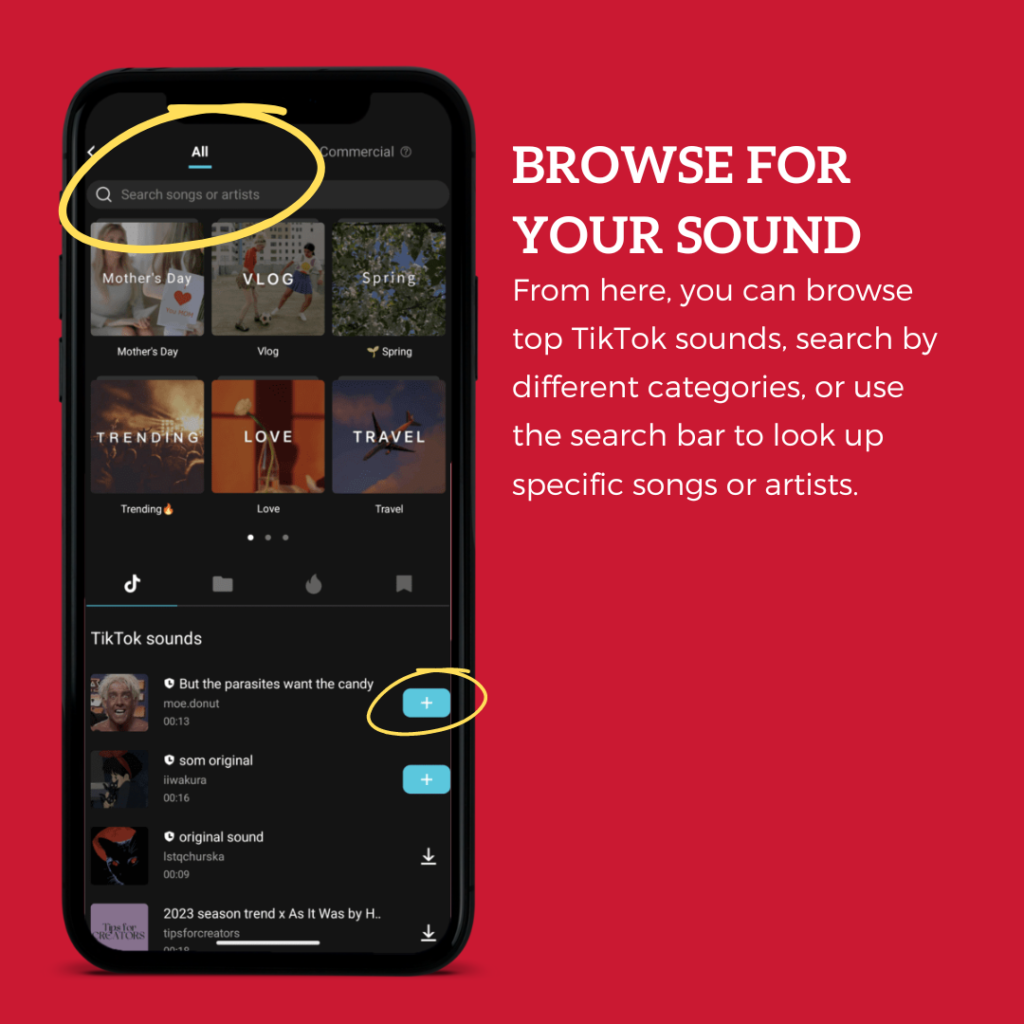
5.2. browse for your sound
From the audio browsing interface, you can explore top TikTok sounds, search through different categories, or use the search bar to find specific songs or artists. Once you find the audio you want to use, simply select it.
5.3. Finalize your audio
After the audio is added to your video, it will appear beneath your video timeline. You can then adjust the duration and volume of the audio to match your video perfectly. Additionally, you can add effects to your audio through the options available in the bottom toolbar, provided the audio clip is selected.
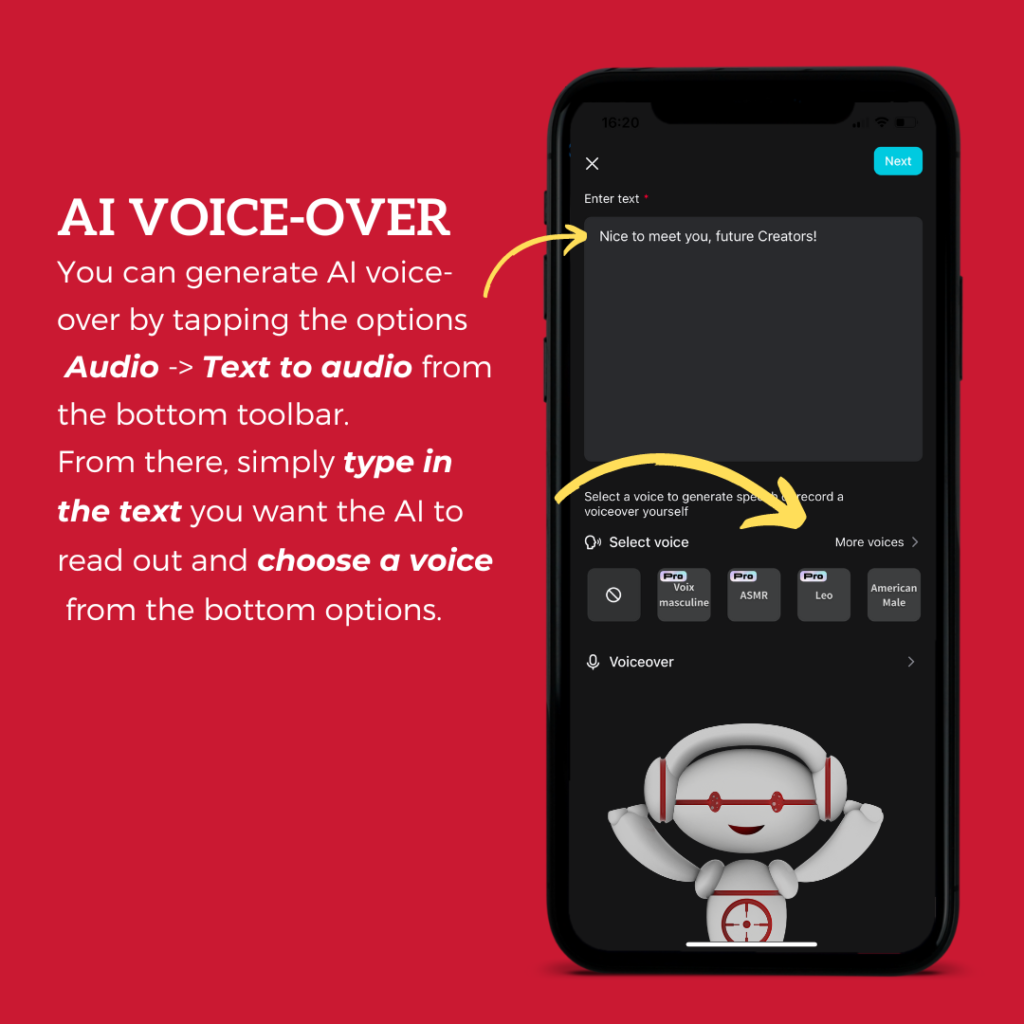
5.4. AI Voice-over
For a more dynamic touch, you can generate an AI voice-over. To do this, tap ‘Audio’ in the bottom toolbar, then select ‘Text to Audio.’ Enter the text you want the AI to read and choose a voice from the available options. This feature allows you to add custom voice-overs to your videos easily.
By following these steps, you can seamlessly integrate audio into your CapCut projects, adding another layer of professionalism and creativity to your videos.

6. text and titles
Adding text to your videos in CapCut can enhance communication and engagement with your audience. Here’s a step-by-step guide to adding and customizing text in CapCut.
To begin, locate and tap on the ‘Text’ button found in the bottom toolbar of your workspace. You’ll be presented with several options: Auto-Caption, Text Templates, Stickers, and the basic ‘Add Text’ option.
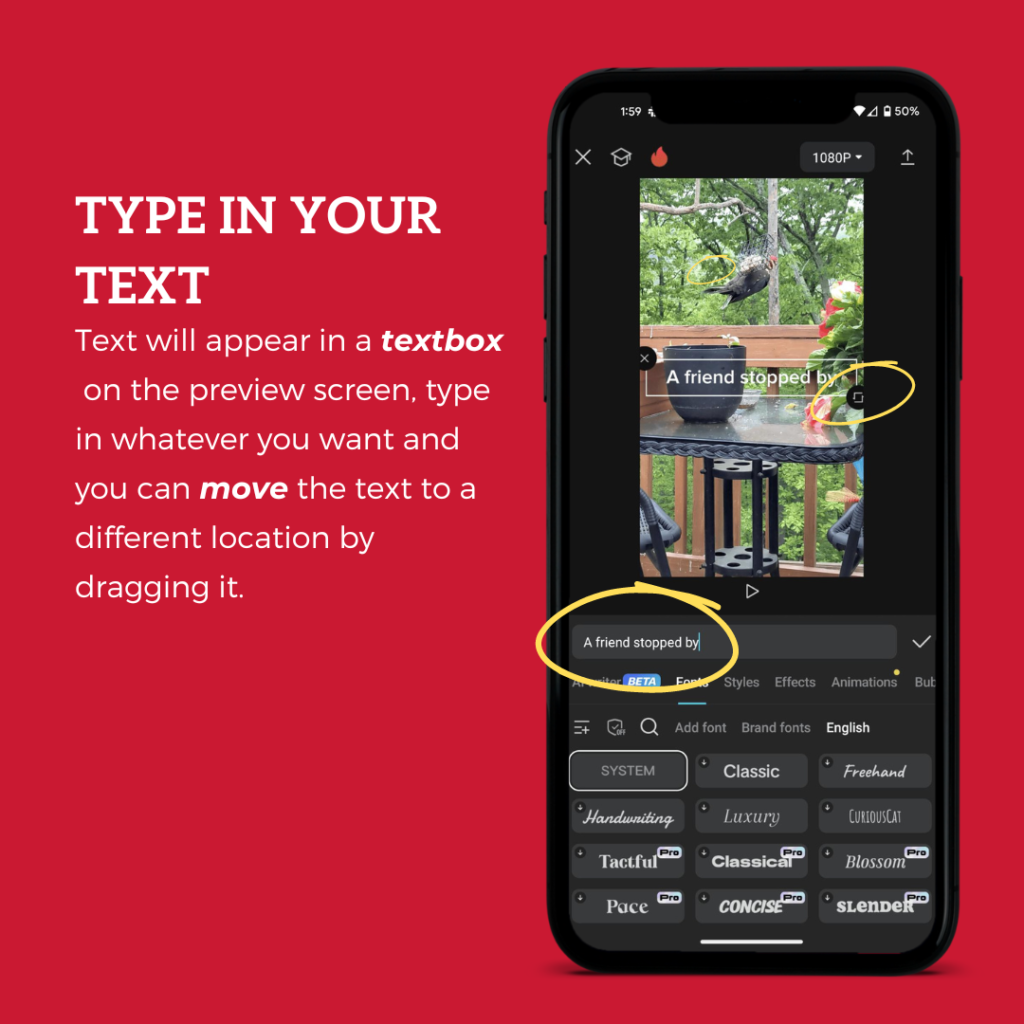
6.1. type in your text
Once you’ve selected ‘Add Text’, a text box will appear on the preview screen. Type in the text you want to add to your video.
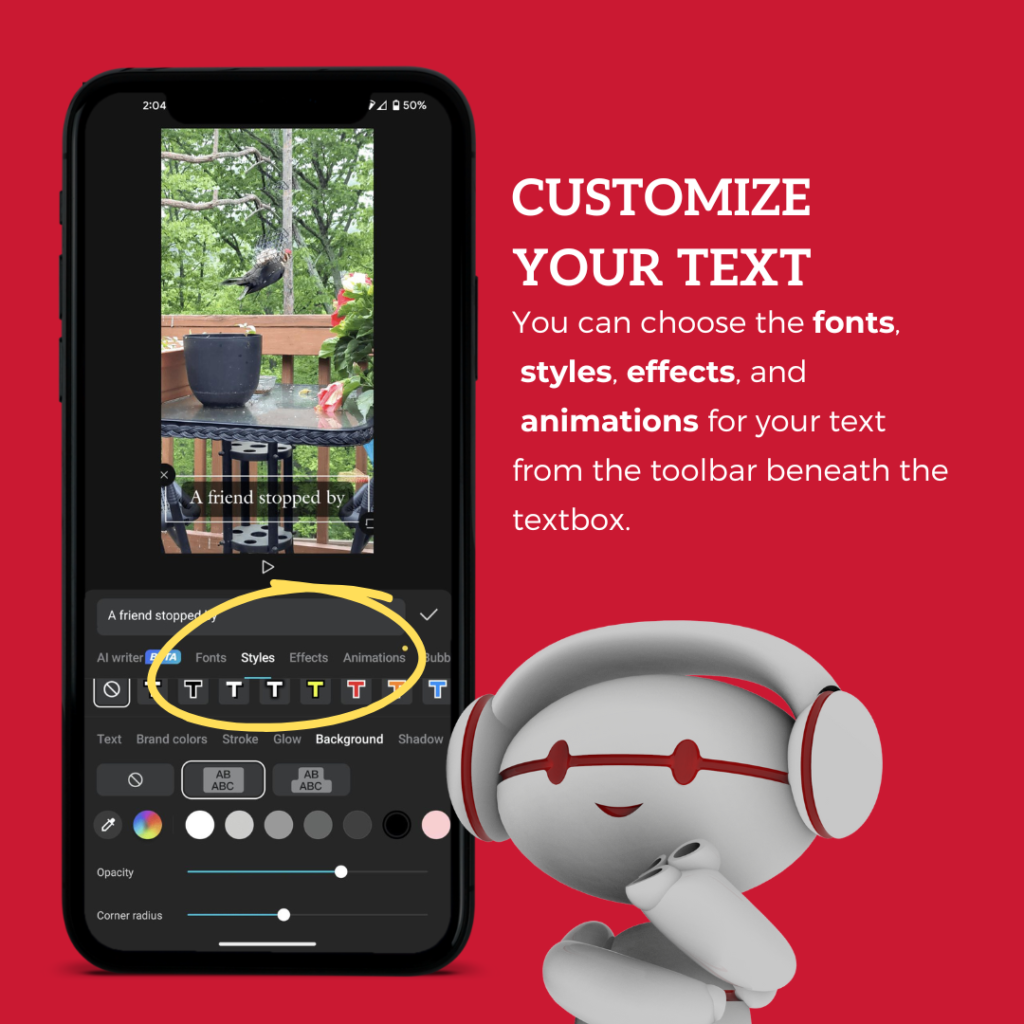
6.2. customize your text
CapCut offers a variety of customization options for your text. You can choose different fonts, styles, effects, and animations to make your text stand out. These options are accessible from the toolbar beneath the text box.
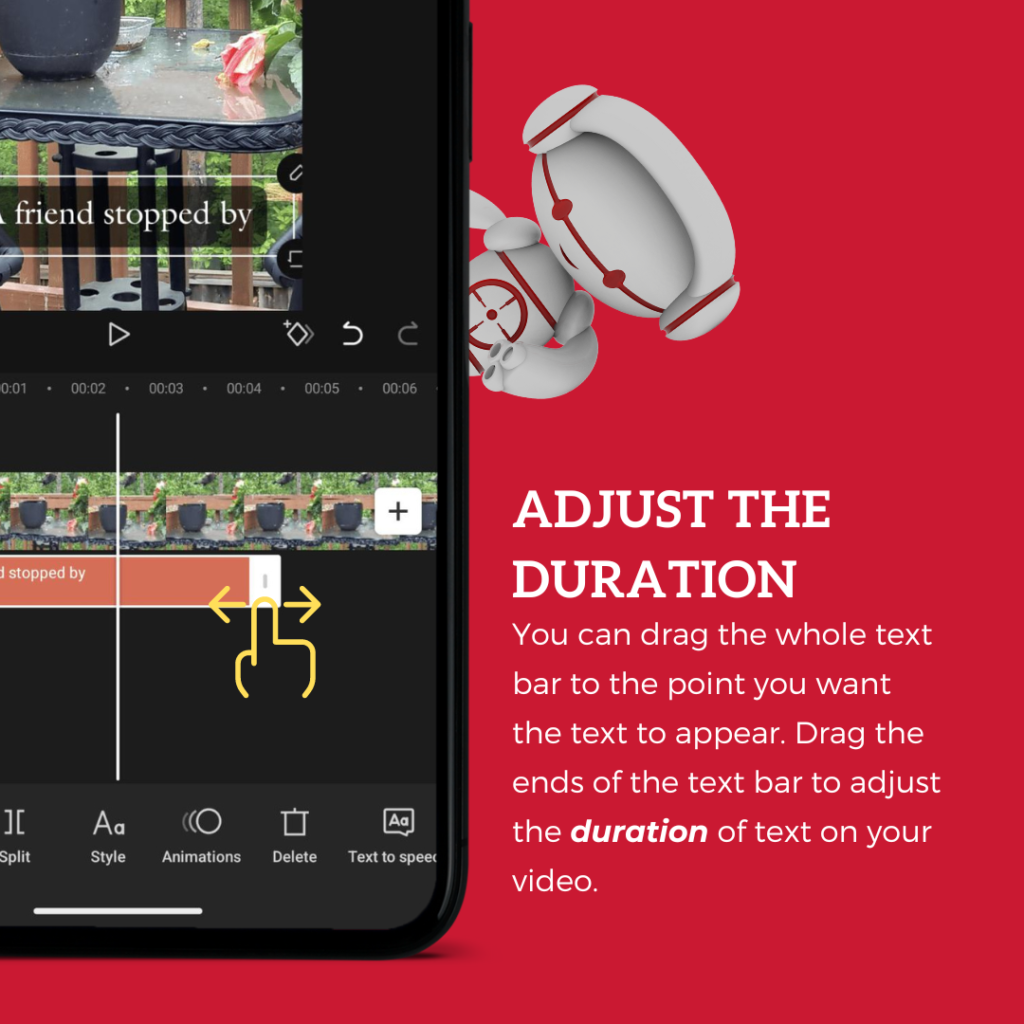
6.3. adjust the text duration
To control when the text appears and how long it stays on screen, drag the entire text bar to the desired point on your timeline. You can also adjust the duration by dragging the ends of the text bar to shorten or lengthen the display time.


How are your first steps in navigating CapCut for your videos? We hope this has been useful to let you kickstart your Content Creation journey. On top of that, why don’t you check out some other sources to better understand the fundamentals of mobile video editing:
CapCut 101 by CapCut’s family themselves
That’s it for this month’s Addy’s Advices! We wish you lots of lucks! Happy editing!
Send us a message
Latest News & Articles


Discover More
For Brands
Copyright © 2024 Adshot, All rights reserved.